Best mini PCs for Home Assistant and local smart homes
Compare N100/N150 mini PCs, used NUCs and Raspberry Pi for Home Assistant. Choose by workload, installation method, storage and support.
On this page
- Quick verdict
- What matters in a smart-home mini PC
- N100 and N150 mini PCs: compare complete configurations
- Beelink EQ14: check stock and networking
- Intel NUC 12 Pro: a used-hardware option
- Best NUC for Home Assistant
- How much mini PC Home Assistant needs
- Building a low-power server
- Raspberry Pi vs mini PC
- What to avoid
For a dedicated Home Assistant host, I would start with an Intel N100 or N150 mini PC with an internal SSD and install Home Assistant OS. Size the machine around any camera, voice or other server workloads you plan to add. If you already have a suitable computer, try that before buying another one.
This is a research guide. I haven’t run these mini PCs or Home Assistant on a Raspberry Pi myself; the recommendations below use the official installation documentation and manufacturer specifications, not my own performance measurements.
Quick verdict
Choose the installation method before choosing a processor. Home Assistant recommends Home Assistant OS for most users. It manages the operating system and supports apps, formerly called add-ons. Home Assistant Container requires you to maintain the host and run extra services separately.
| Your workload | Installation and buying checks |
|---|---|
| Home Assistant and MQTT | N100/N150 mini PC with Home Assistant OS. Check included RAM/SSD, Ethernet and access to firmware settings. |
| Existing shared server | Home Assistant OS in a VM, or Container if you manage Docker. Check spare memory/storage and USB radio access. |
| Frigate cameras | Choose the decoder and detector first. Check camera streams, detection model, recording storage and supported acceleration. |
For a new dedicated box, the Beelink EQ14 is on my shortlist. Its configuration and shipping status need checking. The GMKtec G3 is an older N100 reference point with a sold-out maker listing. A used NUC needs a support-date check before it earns a place on the shortlist.
What matters in a smart-home mini PC
The generic x86-64 installation guide requires a 64-bit Intel/AMD machine with UEFI boot and Secure Boot disabled for Home Assistant OS. Check that you can change those settings, especially on a used business PC.
- Compare the complete machine, including RAM, storage and power supply. A barebone kit leaves some of that shopping to you.
- Prefer an internal SSD for a new mini-PC purchase. A SATA SSD is a valid option; Home Assistant does not require NVMe.
- Check the Ethernet connection and ports needed for your devices. Extra network ports are useful only if your network design uses them.
- Look for a documented firmware/support path, return terms and room for ventilation.
- Compare the complete price with a ready-made Home Assistant Green if you want less installation work.
N100 and N150 mini PCs: compare complete configurations
The original GMKtec G3 manufacturer page identifies an N100 model and showed it as sold out when checked on September 11, 2026. I would not plan a new installation around that listing being available.
For this tier, compare the exact CPU, installed memory, included SSD and warranty across available machines. G3, G3 Plus and other similarly named boxes should not be treated as interchangeable listings. A lower barebone price can disappear once you add the missing parts.
Beelink EQ14: check stock and networking
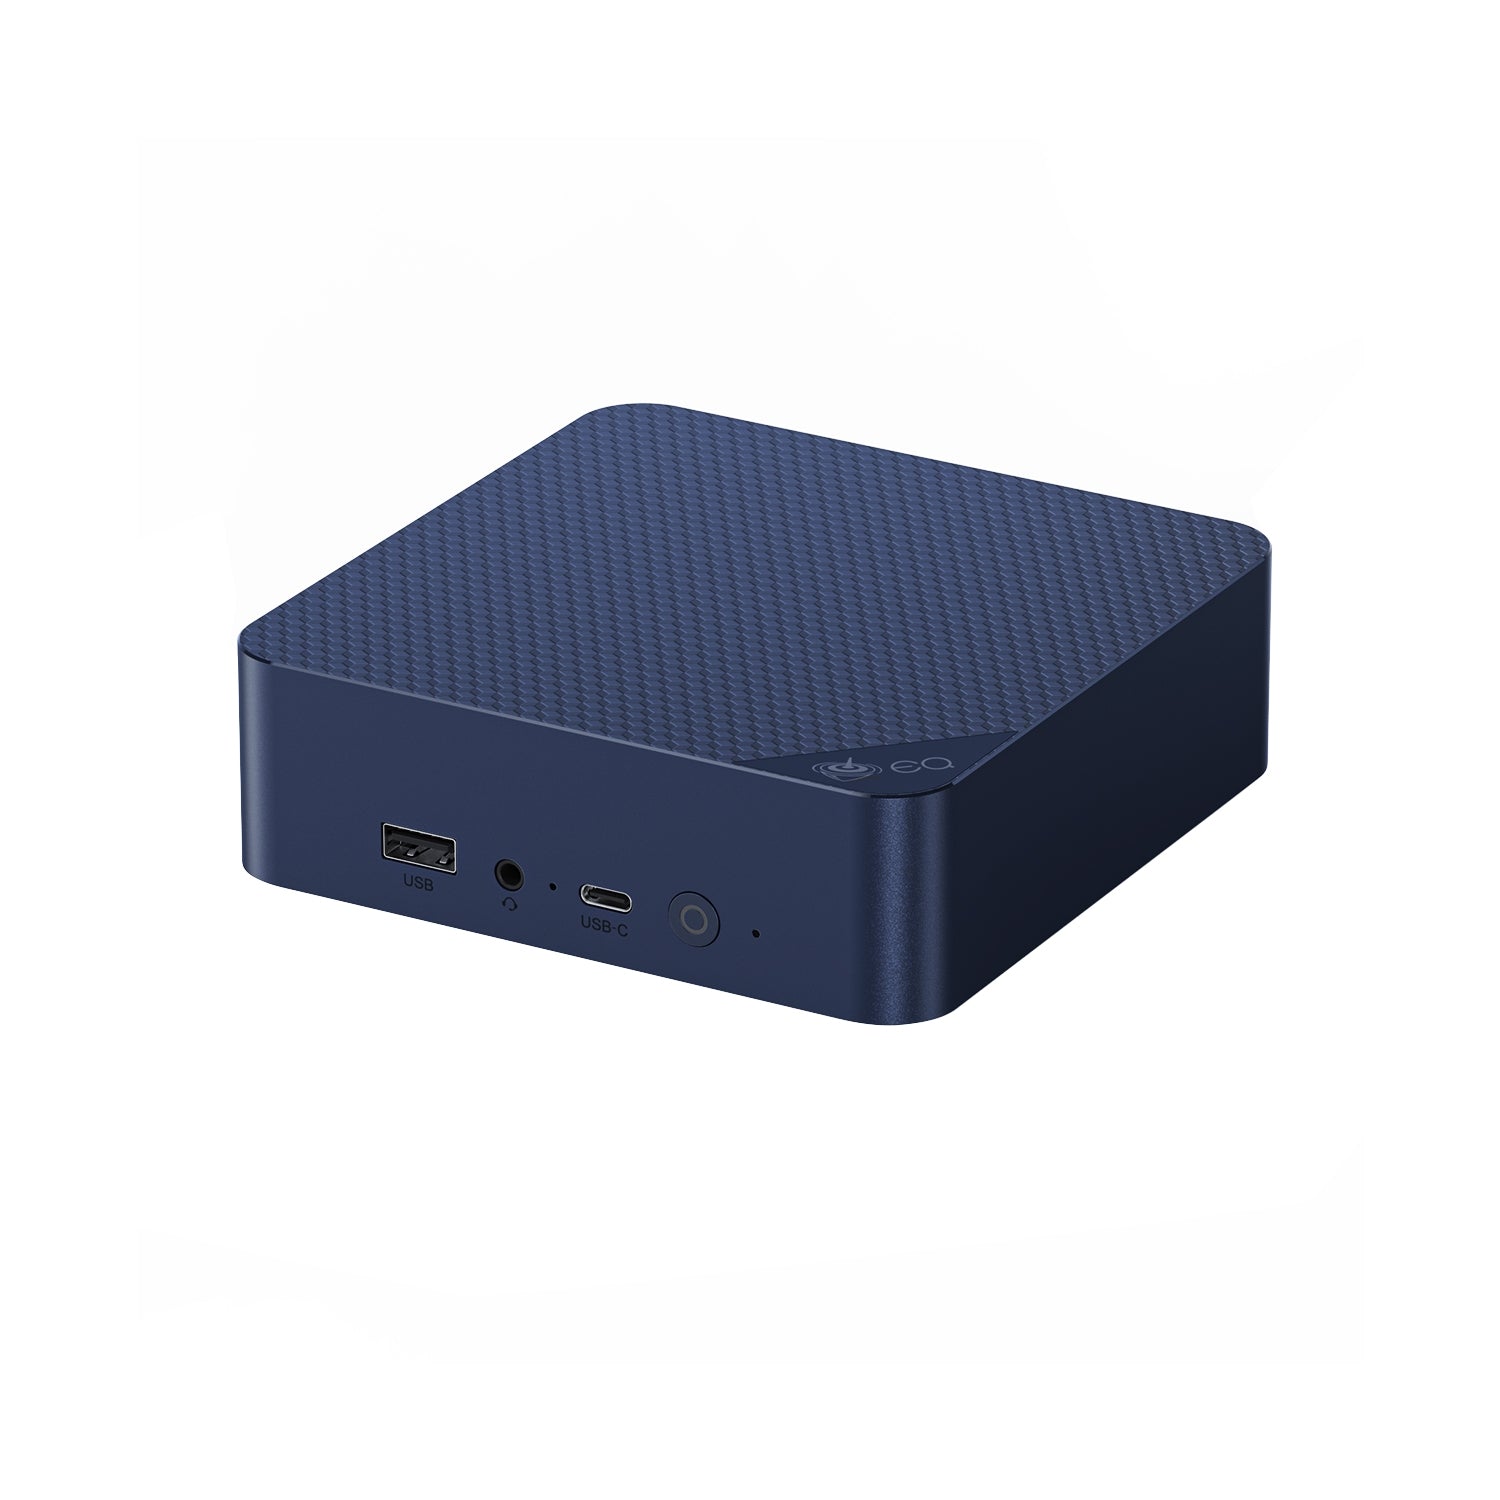
I would shortlist the Beelink EQ14 for a dedicated Home Assistant installation because its published configuration includes an N150, 16GB of DDR4 and a 500GB SSD.
Beelink’s specifications describe an internal power supply, network-port options and a supplied SATA III SSD. M.2 describes the drive’s form factor; it does not guarantee that the included drive uses NVMe. On September 11, 2026, the selected dual-2.5GbE configuration was marked pre-order. Confirm the configuration and delivery estimate before ordering.
Intel NUC 12 Pro: a used-hardware option
The NUC 12 Pro needs a support-date check alongside the usual used-PC inspection. In the ASUS support table, the Wall Street Canyon row covering NUC12WSBx, NUC12WSHx and NUC12WSKx lists discontinuation on April 1, 2024, software support ending October 1, 2025, and security support ending April 1, 2027. Some separately listed kits with a model code ending in Z have an earlier security endpoint. Match the full model code, including its suffix, rather than applying one date to every NUC 12 Pro.
I would consider one only after checking its exact CPU, included RAM/storage, condition and remaining support against the complete price of an alternative. A listing for a kit and a listing for a finished mini PC can require different additional purchases.
Best NUC for Home Assistant
For Home Assistant alone, I would not pay a premium for the NUC badge. If you want one for a shared server or camera workload, choose the exact CPU and supported acceleration first, then compare current ASUS models and used units against those requirements.
Check the ASUS support-status table for the specific model. A higher generation number does not by itself establish the support period or the GPU features your application needs. I cannot name a tested NUC winner from the machines in this guide.
How much mini PC Home Assistant needs
For a new dedicated mini PC, I would compare 8GB-or-larger configurations to leave room for supporting services. That is a shopping preference, not a Home Assistant minimum or a promised device capacity. The right storage size also depends on how much history, media and backup data you keep.
Frigate changes the calculation. Its video-decoding documentation recommends GPU acceleration for decoding streams. Object detection is a separate task: OpenVINO can use supported Intel GPUs, while other detectors have different requirements. Buying a detection accelerator does not automatically accelerate video decoding.
Frigate’s hardware guide includes N100 and N150 examples, so camera use does not automatically require a Core i-series machine. Check the intended camera streams, detection model and other services together. My Frigate NVR setup guide covers that planning in more detail.
When you’d want more: Minisforum UM790 Pro
The Minisforum UM790 Pro is an option to compare when other server workloads justify more resources. Minisforum lists a Ryzen 9 7940HS, Radeon 780M graphics, two M.2 storage slots and dual USB4 ports. Check whether the selected configuration includes RAM and storage, and its shipping estimate.
For Frigate, do not assume its AMD graphics follow the Intel OpenVINO GPU setup. Match the detector and decoder to the hardware before buying.
Radios and hubs are separate purchases
Matter uses IP networking; it is not a radio you add to a mini PC. Home Assistant’s Matter documentation distinguishes the connections:
| Devices you want to connect | What the host needs |
|---|---|
| Matter over Wi-Fi or Ethernet | The Matter integration/server and suitable local-network connectivity; no Thread radio required |
| Matter over Thread | A Thread border router on the network, plus the Matter integration/server |
| Zigbee | A supported coordinator and ZHA or Zigbee2MQTT |
| Z-Wave | A compatible controller and Z-Wave JS |
A border router can be a separate device; it does not have to plug into the mini PC. Follow the Thread setup guidance if you already have one. Home Assistant OS is the supported installation path for the official Matter app; Container users must manage a separate Matter server without that same supported setup.
For Zigbee, choose from the coordinator guide after deciding where the radio belongs. Keep an existing lighting bridge if it already does the job; changing the Home Assistant computer does not require replacing every device connection.
Building a low-power server
Compare measured whole-system power for the configuration and workload you intend to run. A processor’s power rating does not tell you what the finished box, its storage and its peripherals draw at the wall. I do not have comparable measurements for these machines.
Raspberry Pi 4 or 5
A Pi you already own is worth trying before buying another host. Home Assistant’s Raspberry Pi instructions support Pi 4 and Pi 5 models with at least 2GB of RAM and describe installation on a microSD card of at least 32GB, preferably Application Class 2. An SSD is an option to investigate, not a prerequisite for every supported Pi installation.
Intel N100 / N150 mini PC
An internal SSD, memory configuration and case supplied together can make a mini PC convenient to buy and maintain. Compare the complete package with the Pi, storage, enclosure, cooling and power supply you would otherwise purchase. Do not assume either route wins on total cost or electricity use without that comparison.
Set it up lean
For a dedicated machine, follow the official Home Assistant OS installation steps. Writing the image erases the target drive, including Windows and existing files, so back up anything you need first. Use the browser interface for normal administration after installation; firmware setup or initial installation may still require a display and keyboard.
If you already maintain a server, Home Assistant OS in a VM keeps the managed app experience. Container suits a host you manage yourself, with services such as MQTT and Zigbee2MQTT running separately. Account for radio/device access when choosing either arrangement.
What running it costs
Use your own measured average wattage and electricity rate:
Annual kWh = average watts × 24 × 365 ÷ 1,000
For illustration, a device averaging 10W uses 87.6kWh in a year. That is arithmetic, not a measurement of any model here. Multiply by your price per kWh, and include external drives or other equipment if they are part of the installation. The smart-home power guide covers the wider setup.
Raspberry Pi vs mini PC
Choose around the services you need and the hardware you already have. Device counts alone do not describe processor demand, database writes, camera processing or network delays.
The Raspberry Pi approach
A supported Pi is a valid Home Assistant host. It does not become unsuitable when an arbitrary device or entity count is reached. Check memory use, storage health and the services responsible for any slowdown before replacing it.
For an appliance-style option, Home Assistant Green avoids assembling a Pi or installing an operating system on a mini PC. Yellow is discontinued. My Green vs Yellow vs mini PC comparison covers the hardware choices.
The mini PC option
I would move to a mini PC when its storage, available memory or application support solves an identified need. A faster processor cannot promise instant dashboards or eliminate delays caused by a network, integration or remote service.
If an existing server can host Home Assistant, include its maintenance schedule in the decision. Restarting that shared host also stops Home Assistant; a dedicated machine separates those interruptions.
When it matters
Measure the workload that is slow. For cameras, inspect decoding and detector performance. For ordinary automations, check the integration and network path as well as host resources. Keep backups somewhere other than the machine being backed up, whichever hardware you choose.
What to avoid
- A listing that hides the CPU, installed RAM, SSD type or missing barebone parts.
- Buying a sold-out or pre-order configuration without checking its delivery terms.
- Treating a CPU power rating as a measurement of the complete server.
- Assuming a faster computer will fix a radio or network issue.
- Spending on an accelerator before checking the application’s supported hardware.
The Raspberry Pi comparison and workload guidance above are the starting points if you are still deciding what to buy.